


COPYRIGHT © 2016-2026. The Owl Teacher | Privacy page | Disclosure Page | Shipping | Returns/Refunds
I remember struggling with elapsed time as a child. I wanted to just simply line the numbers up and subtract. But, unfortunately, it wasn’t that easy. Sadly, I don’t think I really got it until later, as a teen, when I wanted to go somewhere with friends and needed to figure out exactly how much time it would take to get there and back. Luckily, we have many strategies in our bag of tricks these days that we can use to teach elapsed time to students to help them understand it a lot sooner.

Teach Elapsed Time – Using Four Different Strategies
There are four different strategies that I like to teach my students when it comes to elapsed time. As I mentioned in my posts, Which Is Better in Math: Strategies or Algorithm? and Understanding Addition and Subtraction Strategies, it’s important for students to learn multiple strategies so that they can find the strategy that works best for them and fits their learning style. Each strategy does not need to be taught to mastery but instead taught so that students can find a method that works best for them. As long as the end result of finding elapsed time is done correctly, the how doesn’t matter.
Elapsed Time Strategy 1: Using the T-Chart Strategy

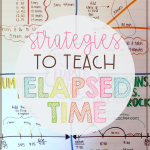
I always write out the start and end times so students can see where we started and where we are going. I create a T-chart, on the left, I write the time, and on the right, I write the hours and minutes between the times on the left side of the T-chart. So, for instance, looking at the picture above, you can see I went from 8:26 to 8:30. That is four minutes, so I wrote four minutes on the right side. I continue to do this and then add it up on the right side to get the total elapsed time. The only thing I would do differently (which I did later on with the class) is separate my hours and minutes. Instead, I would write 0 hours and 4 minutes that way the hours align and so do the minutes.
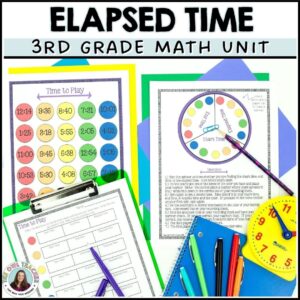
I provide all of my students with reinforcing games and activities that are differentiated. You can see by looking at these practice sheets below how they are differentiated.

Elapsed Time Strategy 2: Using the Zoom Strategy
This strategy I have seen called a few different names. Some have even turned the letter Z in different directions, such as creating an N. Either way, the concept is the same.

At the beginning of the Z, the students write the start time, and at the end, they write the end time. Then, they work their way up to the end. First, they figure out how many minutes it takes to round up to the next hour. So, in this example, if they start at 8:45, then they determine it takes 15 minutes to round up to 9:00. They will write that on the line connecting it (see image above). Then, they figure out how many hours it takes to get to the hour of the end time and write that on the slanted line of the Z. Finally, they determine how many minutes it takes to get from the end hour to the end time. Just as with the last strategy, these middle times on the lines are added up to find the elapsed time.
Elapsed Time Strategy 3: Using the Number Line Strategy
The number line is a big thing now with Common Core, or at least I don’t remember it being implemented as much before. However, this strategy is the one I remember using the most when teaching time before all these strategies did come along.

In this strategy, students first draw a number line with the starting time on the far left. Then, they will move up to the end time by first moving up to the nearest hour of the end time or moving up however many minutes it takes to get to the nearest hour. This is at your discretion or whatever works best for the students. Students work their way to the end time in increments of hours and minutes. Then, all the increments are added up.

Elapsed Time Strategy 4: Mountains, Hills, and Rocks Strategy
This strategy has become my students’ favorite strategy for some reason. I think maybe it is because of the visuals: the mountains (which represent one hour), the hills (which can represent anywhere from five minutes to 30 minutes), and the rocks (which represent one minute).

This strategy really isn’t much different from the number line strategy mentioned above, except that the increments are limited to the hour, a half hour at most, and one minute. What I mean by this is if you have to represent forty-five minutes on the number line, you cannot just simply draw a curved arrow of forty-five minutes like you could on the number line. Instead, you would draw a hill of 30 minutes, and then a hill of 15 minutes.
The advantages of this strategy are that it is more of a visual and that the increments are broken down a bit more. Instead of having a time increment of 47 minutes, it would be broken down into 30 + 15 + 1 + 1. For some students seeing it that way makes it less intimidating. The sizes of the mountain, hills, and rocks also help students visualize the differences between an hour, thirty minutes (or so), and one minute.

As I mentioned earlier, I like to make sure my students have plenty of opportunities to practice each strategy so they can determine which one works best for them. I provide them with lots of games and practice opportunities.

I also make sure I have plenty of real-world opportunities for them to practice the strategy they like the most. For instance, I give each student a little strip with this “Saturday Schedule” for them.

I also love giving them this open activity where they have to actually keep track of their entire Saturday on their own and find the elapsed time of everything they did. They return the sheet on Monday, and we talk about it. I have also provided you with a FREE download. Yes, the PDF is much crisper! Still working on those photography skills…just trying to find the time. I’m sure you can relate! 🙂

GRAB YOUR FREEBIE!
You can grab this sheet above completely FREE by clicking here!
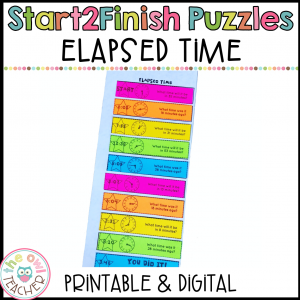
And here is the anchor chart in its entirety:

All of these activities are straight from my Elapsed Time Math Workshop Unit that you can find in my Teachers Pay Teachers store if you want to save time and not make them yourself.